3.4 Logon using codes
You can set up MyID to send an email message containing a one-time logon code to a cardholder. The cardholder can then use this code to authenticate to MyID and complete the operation; for example, to collect their card
Note: If the cardholder makes several failed attempts to enter the logon code, as a security measure, they are prevented from making any further attempts. To allow the cardholder to proceed, you can request another code using the Send Auth Code feature on the View Request screen in the MyID Operator Client; alternatively, you can use the Job Management workflow to cancel the original request, then request another credential for the cardholder. MyID will then send a new logon code.
3.4.1 Setting up logon codes
To set up MyID to send logon codes:
-
From the Configuration category, select Security Settings.
-
On the Logon tab, set the following option
- Allow Logon Codes – set this option to Yes to allow MyID to use logon codes. If you set this option to No, MyID will send logon codes if the Generate Code on Request option in the credential profile is set, but you will be unable to use the codes to log on.
-
Maximum allowed security question failures – Specify the maximum number of failed attempts a user can make when attempting to enter a logon code or answer a security question.
Note: If you set this option to 0, the default value of 3 is used and the user's account is locked when three attempts have been made without success. If you want to provide unlimited attempts to enter logon codes, you can set the Action on maximum security question failures option (on the PINs page of the Security Settings workflow) to None.
-
On the Logon Mechanisms tab, set the following option:
- Password Logon – set this option to Yes.
-
On the Auth Code tab, set the following option:
-
Auth Code Complexity – set this to the complexity you want to use for requests where the complexity is not specified in the credential profile or in the email template. Select one of the following:
-
Complex – uses the complexity determined by the Complex Logon Code Complexity configuration option. This is the default.
-
Simple – uses the complexity determined by the Simple Logon Code Complexity configuration option.
-
-
Auth Code Lifetime for Immediate Use – set this to the number of seconds for which a short lifetime authentication code is valid. To set short lifetime authentication codes for no expiry, set this value to 0. The default is 120 seconds (two minutes).
This lifetime is used for codes sent manually from the View Request screen of the MyID Operator Client when you select the short lifetime from the drop-down list.
-
Complex Logon Code Complexity – the complexity used when you select Complex Logon Code from the Generate Code on Request drop-down list in the credential profile. By default, this is 12-12ULSN[BGIlOQDSZ].
This complexity is also used for codes sent manually from the View Request screen in the MyID Operator Client where the credential profile has the Generate Code on Request option set to None and the Auth Code Complexity option is set to Complex.
Complexity settings (both simple and complex) take the format mm-nnULSN[<excluded>].
mm = min length (must be greater than 0)
nn = max length (greater or equal to the min length, with a max of 99)
U/u = must/may contain upper case (optional)
L/l = must/may contain lower case (optional)
S/s = must/may contain symbols (optional)
N/n = must/may contain numbers (optional)
Specify any characters you do not want to use in the generated code in the <excluded> list; for example:
12-12UN[1IO0]
to exclude the number 1 and letter I, and number 0 and letter O.
You must specify a min length, max length, and at least one of U, L, S, or N.
Note: If you have set the Case sensitive security questions configuration option (on the PINs page of the Security Settings workflow) to No, make sure that you have not included L or l (must/may contain lower case letters) in your complexity format; otherwise, you will be unable to use the generated codes. Use a code like 12-12USN instead.
-
Logon Code Lifetime – set this to the number of hours for which a logon code is valid for collecting a job. To set logon codes for no expiry, set this value to 0. The default is 720 hours (30 days).
This lifetime is used for codes sent automatically when the device is requested, and for codes sent manually from the View Request screen of the MyID Operator Client when you select the long lifetime from the drop-down list.
-
Simple Logon Code Complexity – the complexity used when you select Simple Logon Code from the Generate Code on Request drop-down list in the credential profile. By default, this is 12-12N.
This complexity is also used for codes sent manually from the View Request screen in the MyID Operator Client where the credential profile has the Generate Code on Request option set to None and the Auth Code Complexity option is set to Simple.
-
- Click Save changes.
-
In the Edit Roles workflow:
-
Make sure the cardholder's role has the Password logon mechanism assigned.
-
If you want to request codes from the View Request screen in the MyID Operator Client, make sure the operator has the Send Auth Code for Job Collection or View Auth Code for Job Collection option selected for their role.
-
- From the Configuration category, select Credential Profiles.
- Select the profile you want to edit, and click Modify.
- Select the Issuance Settings section.
-
For Generate Code on Request, select one of the following:
- None – no logon code is generated when the device is requested. However, you can still send or view a code manually from the View Request screen in the MyID Operator Client; see the Sending a collection code section in the MyID Operator Client guide for details.
- Simple Logon Code – the logon code is generated using the complexity rules as defined by the Simple Logon Code Complexity configuration option.
-
Complex Logon Code – the logon code is generated using the complexity rules as defined by the Complex Logon Code Complexity configuration option.
When the device is requested, if the Generate Code on Request option is Simple Logon Code or Complex Logon Code, MyID sends an email message containing the logon code.
Note: If you send a code manually from the View Request screen in the MyID Operator Client, the complexity of the code is determined by the Generate Code on Request option in the credential profile. If, however, the Generate Code on Request option is set to None, the complexity of the code is determined by the Auth Code Complexity option (on the Auth Code page of the Security Settings workflow).
- Click Next and complete the workflow.
-
If you intend to send codes manually through email or SMS from the View Request screen in the MyID Operator Client, from the Configuration category, select Email Templates.
The methods of delivery for the authentication code are determined by the enabled status of the following email templates:
-
Job Collection Auth Code Email – used to send an authentication code in an email message to the person's configured email address. By default, this delivery method is enabled.
This is the template used when you select Collection Code Email from the Delivery Mechanism drop-down list on the Send Collection Code screen.
-
Job Collection Auth Code SMS – used to send an authentication code in an SMS message to the person's configured cell phone number. By default, this delivery method is disabled.
This is the template used when you select Collection Code SMS from the Delivery Mechanism drop-down list on the Send Collection Code screen.
Make sure the delivery methods you want to use are enabled. If you disable both email templates, the operator cannot send a collection code, but may still be able to view a collection code on screen using the View Auth Code feature.
Important: You can edit the content of the email templates, and enable or disable them, but do not change the Transport option, or the notifications will no longer work correctly.
-
-
Set up an SMTP server.
Note: If your business process requires operators to view codes on their screens, and you do not intend to send any codes from the MyID server through email or SMS, you do not have to set up an SMTP server.
See the Setting up email section in the Advanced Configuration Guide for details.
-
If you are using SMS to send the authentication codes, configure your system for SMS notifications:
-
From the Configuration category, select Operation Settings.
-
On the General tab, set the following:
-
SMS email notifications – set to Yes.
-
SMS gateway URL for notifications – set to the URL of your SMS gateway.
By default, SMS messages are sent to through an email to SMS gateway, in the format <cellnumber>@<gateway>, where:
-
<cellnumber> – the cell phone number from the person's record.
-
<gateway> – the URL from the SMS gateway URL for notifications option.
For example: [email protected]
If this is not suitable, you can customize the sp_CustomPrepareSMS stored procedure in the MyID database.
-
-
-
Click Save changes.
-
-
Recycle the web service app pools:
- On the MyID web server, in Internet Information Services (IIS) Manager, select Application Pools.
- Right-click the myid.web.oauth2.pool application pool, then from the pop-up menu click Recycle.
- Right-click the myid.rest.core.pool application pool, then from the pop-up menu click Recycle.
This ensures that the MyID Operator Client picks up the configuration changes.
Note: You must recycle the app pools whenever you make a change to these settings; for example, when changing the availability of email templates or changing the value of a configuration option.
3.4.2 Using logon codes
In
In MyID Desktop, if a user has been provided with a logon code, you must start the program using the /lc command-line option. If the logon code has expired, MyID Desktop does not revert to asking for security phrases; you must close down MyID Desktop and open it again without the /lc command-line option if you want to log on with security phrases.
Important: When you specify the /lc command-line option, you must also specify a workflow using the /opid command-line option to determine the workflow that starts after the user has logged on.
Workflow IDs you may want to include for the /opid parameter include:
-
216 – Collect My Card
-
217 – Request Replacement Card
-
706 – Collect My Certificates
For example:
MyIDDesktop.exe /lc /opid:216
If you do not include an /opid parameter with the /lc parameter, MyID Desktop displays an error similar to:
Incorrect or duplicate command switch
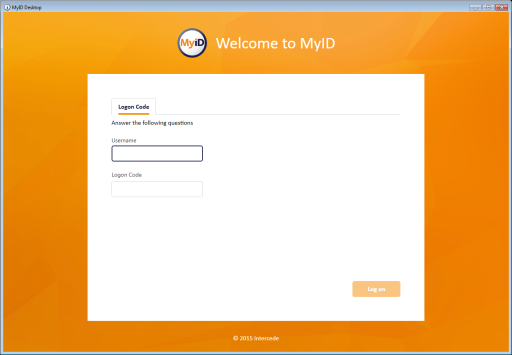
MyID Desktop requests your username and logon code:
You can include a hyperlink in the email notification. Use the Email Templates workflow to modify the Job Logon Code email template, and include a link to the Desktop application similar to the following:
myiddsk:///lc+/opid:216
Note: Make sure you
<a href="myiddsk:///lc+/opid:216">Collect My Card</a>
Note: When logging on with the /lc option, the Set Security Phrase at Logon setting is not enforced – users are not required to set their security phrases, even if they do not have the minimum number required. See section 3.3.3, Setting the number of security phrases required to authenticate for details of the Set Security Phrase at Logon setting.
3.4.3 Configuring authentication codes for the MyID authentication server
You can configure MyID to allow a person to request a single-use authentication code that is sent to their email address or as an SMS message to their cell phone.
Once you have received an authentication code, you can use it to authenticate to the MyID authentication server, and therefore access
For information on using this authentication mechanism to carry out end-user authentication for your own external systems; see the Configuring the web service for OpenID Connect section in the MyID Authentication.
Alternatively, you can configure MyID to allow an operator to request a single-use authentication code to be provided to another person for them to use to authenticate to the MyID authentication server. See the Sending an authentication code to a person and Viewing an authentication code for a person sections in the MyID Operator Client guide for details of sending or viewing authentication codes.
To set up MyID to use authentication codes:
-
Set the configuration options:
-
From the Configuration category, select Security Settings.
-
On the Logon Mechanisms tab, set the following:
-
Authentication Code Logon – set this option to Yes to allow logon using single-use authentication codes. If this option is set to No, the Authentication Code option does not appear on the sign in screen.
-
-
On the Logon tab, set the following:
-
Maximum Allowed OTP Failures – set this option to the maximum number of times you can attempt to enter a single-use authentication code. Once the number of failures exceeds this value, you cannot use the authentication code, and must request a new one.
-
-
On the Auth Code tab, set the following:
-
Auth Code Complexity – specify the complexity of codes when there is no complexity specified in an email template (for example, when an operator views a code on screen).
-
Complex – uses the complexity determined by the Complex Logon Code Complexity configuration option. This is the default.
-
Simple – uses the complexity determined by the Simple Logon Code Complexity configuration option.
-
-
Auth Code Lifetime – set this to the number of seconds for which a long lifetime authentication code is valid. To set long lifetime authentication codes for no expiry, set this value to 0. The default is 720 hours.
The long lifetime is used for operator-requested authentication codes when the operator selects the long lifetime at the request screen.
-
Auth Code Lifetime for Immediate Use – set this to the number of seconds for which a short lifetime authentication code is valid for logging on to the MyID Operator Client. To set short lifetime authentication codes for no expiry, set this value to 0. The default is 120 seconds.
The short lifetime is used for self-requested authentication codes, and for operator-requested authentication codes when the operator selects the short lifetime at the request screen.
-
-
Click Save changes.
-
-
Configure the logon methods for the roles:
-
From the Configuration category, select Edit Roles.
-
Click Logon Methods, and select the Authentication Code option for each role you want to be able to log on using an authentication code.
-
Click OK.
-
If you want an operator to be able to send or view codes from the View Person screen in the MyID Operator Client, make sure the operator has the Send Auth Code for Logon or View Auth Code for Logon options selected for their role.
-
Click Save Changes.
-
-
From the Configuration category, select Email Templates.
The methods of delivery for the authentication code are determined by the enabled status of the following email templates:
-
For authentication codes requested by the person at the login screen for their own use:
-
Self Requested Authentication Code Email – used to send an authentication code in an email message to the person's configured email address. By default, this delivery method is enabled.
-
Self Requested Authentication Code SMS – used to send an authentication code in an SMS message to the person's configured cell phone number. By default, this delivery method is disabled.
Make sure the delivery methods you want to use are enabled. You can choose one or both of the delivery methods. If you disable both templates, a person can still use an authentication code to log in, but it must be requested by an operator.
-
-
For authentication codes requested by an operator for another person to use at the logon screen:
-
Authentication Code Email – used to send an authentication code in an email message to the person's configured email address. By default, this delivery method is enabled.
-
Authentication Code SMS – used to send an authentication code in an SMS message to the person's configured cell phone number. By default, this delivery method is disabled.
Make sure the delivery methods you want to use are enabled. You can choose one or both of the delivery methods. If you disable both templates, a person can still request an authentication code for their own use (providing the appropriate self request templates are enabled) or an operator can view an authentication code using the View Auth Code feature.
-
Note: The complexity of the code is determined by the Complexity option configured in the email template. See section 13.2, Changing email messages for details.
Important: You can edit the content of the email templates, and enable or disable them, but do not change the Transport option, or the notifications will no longer work correctly.
-
-
Set up an SMTP server.
Note: If your business process requires operators to generate codes for other people and view codes on their screens, and you do not intend to send any codes from the MyID server through email or SMS, you do not have to set up an SMTP server.
See the Setting up email section in the Advanced Configuration Guide for details.
-
If you are using SMS to send the authentication codes, configure your system for SMS notifications:
-
From the Configuration category, select Operation Settings.
-
On the General tab, set the following:
-
SMS email notifications – set to Yes.
-
SMS gateway URL for notifications – set to the URL of your SMS gateway.
By default, SMS messages are sent to through an email to SMS gateway, in the format <cellnumber>@<gateway>, where:
-
<cellnumber> – the cell phone number from the person's record.
-
<gateway> – the URL from the SMS gateway URL for notifications option.
For example: [email protected]
If this is not suitable, you can customize the sp_CustomPrepareSMS stored procedure in the MyID database.
-
-
-
Click Save changes.
-
-
Recycle the web service app pools:
- On the MyID web server, in Internet Information Services (IIS) Manager, select Application Pools.
- Right-click the myid.web.oauth2.pool application pool, then from the pop-up menu click Recycle.
- Right-click the myid.rest.core.pool application pool, then from the pop-up menu click Recycle.
This ensures that the MyID Operator Client picks up the configuration changes.
Note: You must recycle the app pools whenever you make a change to these settings; for example, when changing the availability of email templates or changing the value of a configuration option.